VisualEffectPlugin
This section explains how to simulate camera images using the VFX Vision Simulator.
Generating an Image View
Camera images with visual effects applied by the VFX Vision Simulator are displayed in the "Image View." To generate an Image View, select "View" - "Show View" - "Image" from the main menu.
Generating an Image View Bar
The Image View Bar is used to select the camera to simulate. Generate an Image View Bar by selecting "View" - "Show Toolbar" - "Image View Bar" from the main menu.
Configuring a Multi-Collider Item
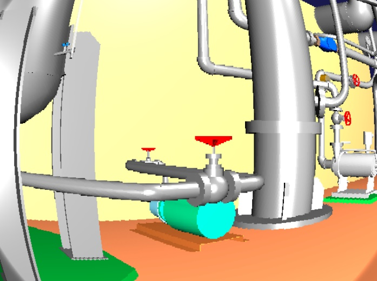
A Multi-Collider item defines the area where visual effects are applied to camera images. To generate one, select "File" - "New" - "Multi-Collider" from the main menu. The generated Multi-Collider item should be placed as a child item of a World item or a Body item. If placed as a child of a World item, visual effects will be applied to the camera image when a link with a camera configured enters the area specified by that Multi-Collider item. If placed as a child of a Body item, the Multi-Collider item will move in synchronization with the body's movement, and visual effects will always be applied to the camera image.
Visual effects can be configured by changing the properties of the Multi-Collider item. To change properties, select the desired Multi-Collider item in the Item Tree View and modify the parameters in the Property View. Below are the Multi-Collider properties for defining the area where visual effects are applied to camera images and for setting the visual effects to be applied to camera images.
Parameter |
Default Value |
Unit |
Meaning |
|---|---|---|---|
Hue |
0 |
- |
Adjusts the hue (0.0~1.0). |
Saturation |
0 |
- |
Adjusts the saturation (0.0~1.0). |
Brightness |
0 |
- |
Adjusts the brightness (0.0~1.0). |
Red |
0 |
- |
Adjusts the brightness of red (0.0~1.0). |
Green |
0 |
- |
Adjusts the brightness of green (0.0~1.0). |
Blue |
0 |
- |
Adjusts the brightness of blue (0.0~1.0). |
Distortion |
0 |
- |
Adjusts the degree of barrel distortion (-1.0~0.0). |
Magnification |
0 |
- |
Adjusts the magnification (1.0~32.0). |
Standard Deviation |
1 |
- |
Adjusts the degree of Gaussian noise (0.0~1.0). |
White Noise Amount |
0 |
- |
Adjusts the amount of white noise in the camera image (0.0~1.0). |
White Noise Probability |
0 |
- |
Adjusts the probability of applying white noise to the camera image (0.0~1.0). |
Black Noise Amount |
0 |
- |
Adjusts the amount of black noise in the camera image (0.0~1.0). |
Black Noise Probability |
0 |
- |
Adjusts the probability of applying black noise to the camera image (0.0~1.0). |
Mosaic Probability |
0 |
- |
Adjusts the probability of applying mosaic to the camera image (0.0~1.0). |
Mosaic Size |
0 |
- |
Adjusts the mosaic size (8~64). |
Shape |
Box |
- |
Specifies the shape of the area (Box/Cylinder/Sphere). |
Size |
1.0, 1.0, 1.0 |
m, m, m |
Specifies the size of the area in XYZ (only for Box shape). |
Radius |
1.0 |
m |
Specifies the radius of the area (only for Cylinder/Sphere shapes). |
Height |
1.0 |
m |
Specifies the height of the area (only for Cylinder shape). |
Position |
0, 0, 0 |
m, m, m |
Specifies the position of the area in XYZ. |
RPY |
0, 0, 0 |
deg, deg, deg |
Specifies the orientation of the area in Roll, Pitch, Yaw. |
Diffuse Color |
0, 0, 0 |
-, -, - |
Specifies the diffuse color of the area in RGB. |
Transparency |
0 |
- |
Specifies the transparency of the area. |
Creating and Configuring a VFX Vision Simulator
The VFX Vision Simulator is an item used to apply visual effects to camera images. The VFX Vision Simulator inherits from Choreonoid's GL Vision Simulator and performs both camera image generation and visual effect application. Here, we'll use Choreonoid's standard simulator item, "AIST Simulator." Select "File" - "New" - "VFX Vision Simulator" from the main menu to generate it. The VFX Vision Simulator should be placed as a child item of the AIST Simulator item. Next, select "File" - "New" - "Sensor Visualization" from the main menu to generate a Sensor Visualizer. The generated Sensor Visualizer should be placed as a child item of any Body item. When a Sensor Visualizer is set as a child item of a Body item, a CameraImageVisualizerItem is automatically generated for each camera configured on the body. The cameras checked in this automatically generated item's checkbox will be registered in the combo box of the Image View Bar.
Regarding visual effects applied by the VFX Vision Simulator, the VFX Vision Simulator can apply "Hue (H), Saturation (S), Brightness (V)," "Red (R), Green (G), Blue (B)," "Distortion," "Magnification," "Gaussian Noise," "Salt-and-Pepper Noise (White Noise, Black Noise)," and "Mosaic" as shown in the Multi-Collider properties above. However, if all these visual effects are applied to a camera image, the computational load for image processing may increase, and the simulation might not run in real time.
Running the Simulation
Run the simulation as usual from the simulation bar. Select any Image View and then choose a camera from the combo box in the Image View Bar to display the camera image. Below is an example of a camera image with distortion set to -0.3 and magnification set to 1.7.